Why Patio Design Deserves More Thought Than It Gets
Most homeowners spend weeks choosing kitchen countertops but only minutes deciding on their patio layout. Yet the patio is often the most-used outdoor feature — it's where you eat, entertain, relax, and connect with your garden. A poorly designed patio (too small, wrong shape, bad materials) will frustrate you for years. A well-designed one becomes the heart of your outdoor life.
The most common patio mistake is making it too small. Homeowners often underestimate how much space they need for dining, circulation, and furniture. A table for six requires a minimum patio area of 12×14 feet just for the dining zone — before adding lounge seating, a grill area, or circulation space. AI tools help you avoid this mistake by showing furniture placement at realistic scale on your actual space.
Choosing the Right Patio Layout
The Single-Zone Patio
A single-zone patio works well for smaller backyards or homeowners with one primary outdoor activity. This is typically a rectangular or square platform adjacent to the house, large enough for either dining or lounging (but not both). Keep the shape simple and focus your budget on quality materials and comfortable furniture.
Ideal size: 12×16 feet minimum for a dining set; 10×12 feet minimum for a lounge grouping.
The Two-Zone Patio
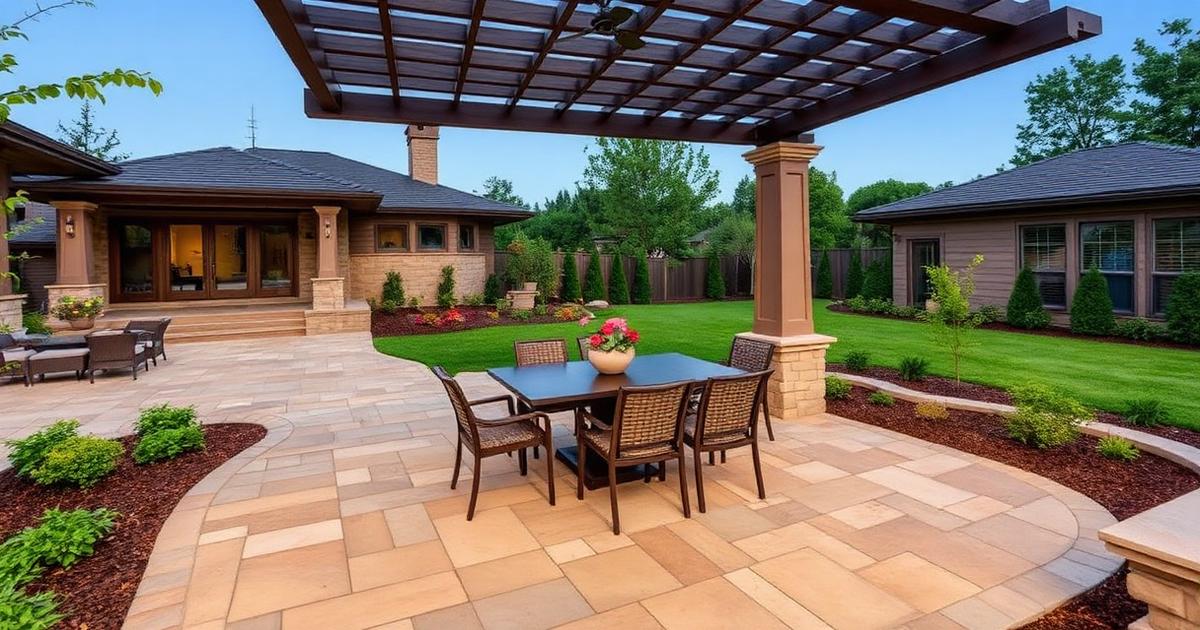
The most popular configuration: a dining zone near the kitchen door and a separate lounge/fire pit zone further from the house. These zones can be connected (one continuous surface with a visual divider like a planter or level change) or separated (a path or planted gap between them).
The two-zone approach creates natural flow for entertaining — guests can move between dining and relaxation areas without feeling crowded. It also allows different materials or finishes in each zone for visual variety.
The Wrap-Around Patio
A patio that extends along two or more sides of the house creates multiple outdoor "rooms," each with a different character. The south-facing section gets sun, the east-facing section offers morning shade, and the section under the eave stays dry in rain. This maximizes usable outdoor space and gives you options throughout the day as sun and shade shift.
The Destination Patio
Rather than placing the patio directly against the house, this approach puts a patio or platform at a destination point in the garden — under a large tree, overlooking a pond, or at the far end of the yard. Connected to the house by a path or stepping stones, a destination patio creates a reason to journey through the garden and often provides better views and more privacy than a house-adjacent setup.
Patio Materials Compared
Natural Stone
Pros: Timeless beauty, unique character, ages gracefully, increases home value. Cons: Higher cost ($15-$30/sq ft installed), can be uneven for furniture, requires occasional resealing. Best for: Traditional, Mediterranean, and high-end contemporary designs. Popular options include bluestone, flagstone, limestone, and slate.
Concrete Pavers
Pros: Versatile shapes and colors, consistent surface, DIY-friendly, easy to repair individual units. Cons: Can look generic without thoughtful design, may shift over time without proper base. Best for: Modern designs, geometric patterns, and budget-conscious projects. Cost: $8-$15/sq ft installed.
Poured Concrete
Pros: Seamless surface, fully customizable shape, can be stamped, stained, or polished. Cons: Can crack, professional installation required, difficult to modify once poured. Best for: Modern and minimalist designs, large continuous areas, and custom shapes. Cost: $8-$18/sq ft installed.
Brick
Pros: Classic charm, warm color, excellent for traditional and cottage styles, very durable. Cons: Limited color range, can grow moss in shade, higher labor cost for complex patterns. Best for: Colonial, cottage, and traditional designs. Herringbone and basket-weave patterns are timeless. Cost: $10-$20/sq ft installed.
Porcelain Pavers
Pros: Ultra-low maintenance, stain-resistant, consistent color, available in wood and stone looks. Cons: Higher material cost, can be slippery when wet (choose textured finishes), requires precise installation. Best for: Contemporary designs where a clean, uniform look is desired. Cost: $12-$25/sq ft installed.
Furniture Placement Principles
Getting furniture placement right is critical for a patio that actually functions well. Key principles:
Dining Zone
- Allow 36 inches of clearance behind each chair for comfortable seating and passage
- Place the dining table within 20 feet of the kitchen door if possible — anything further makes carrying food impractical
- Orient the table so the primary cook faces the conversation, not a wall
- Ensure the dining area gets afternoon shade in summer (via umbrella, pergola, or tree canopy)
Lounge Zone
- Arrange seating in a conversation-friendly grouping — chairs and sofas facing each other, not all facing out
- Keep the conversation circle under 10 feet in diameter — beyond this, people have to raise their voices
- Include a coffee table or side tables within arm's reach of every seat
- Orient the primary seating to face the best view (garden, sunset, fire feature)
Circulation
- Maintain 3-foot-wide pathways between zones and around furniture
- The path from the house to the garden should feel natural and unobstructed
- If the patio serves as a thoroughfare (house to garage, etc.), keep the traffic lane clear of seating
Shade Solutions
An unshaded patio in midsummer is unusable. Plan your shade strategy as part of the patio design, not as an afterthought:
Pergola: The most popular shade structure. Traditionally, pergolas provide partial shade through spaced rafters. For full shade, add retractable canopy fabric, climbing plants, or shade cloth. A pergola also defines the patio space architecturally and provides attachment points for lighting and fans.
Shade sail: Triangular or rectangular fabric panels stretched between posts or attachment points. Modern, sculptural, and cost-effective. Available in different shade percentages for varying amounts of sun filtering. Easy to remove seasonally.
Cantilever umbrella: A large umbrella mounted on a side pole rather than a center pole, allowing the shade to extend over the table without an obstruction in the middle. Available in 10-13 foot sizes that shade entire dining areas. The most flexible option — easy to adjust, move, or close.
Natural shade: Deciduous trees provide summer shade while allowing winter sun — the ideal natural solution. A well-placed shade tree can reduce patio temperatures by 15-20°F. However, trees take years to grow, so combine tree planting with an interim shade structure.
How AI Helps You Design the Perfect Patio
Patio design involves dozens of interconnected decisions: size, shape, material, furniture layout, shade structure, relationship to the house, relationship to the garden. Change one variable and everything else shifts. This complexity is exactly where AI design tools provide the most value.
- Upload your backyard photo — The AI maps your space, noting the house wall, existing features, and proportions
- Select patio style — Modern, traditional, Mediterranean, minimalist, or resort-inspired
- See the concept — The AI generates a realistic visualization showing the patio integrated into your actual backyard
- Test variations — Try different materials (what does stone vs. pavers look like in your space?), different sizes, different furniture arrangements
- Finalize your plan — Use the AI concept as a specification for contractors or as your DIY blueprint
The Patio Sizing Formula
To size your patio correctly: (1) List every activity it must support, (2) Allocate square footage — 100 sq ft for dining (6 people), 80 sq ft for lounge seating, 40 sq ft for grill area, 30 sq ft per additional feature, (3) Add 20% for circulation. A patio supporting dining + lounging + grilling needs approximately 300 square feet minimum.
Budget Planning for Your Patio
$2,000-$5,000: DIY paver patio (200-300 sq ft), basic furniture set, no shade structure. A solid starter patio that you can enhance over time.
$5,000-$15,000: Professionally installed patio (300-500 sq ft), quality pavers or entry-level stone, pergola or shade sail, mid-range furniture.
$15,000-$30,000: Large natural stone or porcelain patio, custom pergola with lighting, built-in features (planters, fire pit), premium furniture.
$30,000+: Full outdoor room with covered structure, outdoor kitchen, custom stonework, landscape lighting, and designer furniture.
Design Your Perfect Patio
Upload a photo of your backyard and see how different patio layouts, materials, and furniture arrangements would look in your space. Compare options side by side and make confident decisions.
Try AI Patio Design Free →